Building VPP Documents
Overview
These instructions show how the VPP documentation sources are built.
FD.io VPP Documentation uses reStructuredText (rst) files, which are used by Sphinx. We will also cover how to view your build on Read the Docs in Using Read the Docs.
To build your files, you can either Create a Virtual Environment using virtualenv, which installs all the required applications for you, or you can Install Sphinx manually.
Create a Virtual Environment using virtualenv
For more information on how to use the Python virtual environment check out Installing packages using pip and virtualenv.
Get the Documents
For example start with a clone of the vpp-docs.
$ git clone https://gerrit.fd.io/r/vpp
$ cd vpp
Install the virtual environment
In your vpp-docs directory, run:
$ python -m pip install --user virtualenv
$ python -m virtualenv env
$ source env/bin/activate
$ pip install -r docs/etc/requirements.txt
$ cd docs
Which installs all the required applications into it’s own, isolated, virtual environment, so as to not interfere with other builds that may use different versions of software.
Build the html files
Be sure you are in your vpp-docs/docs directory, since that is where Sphinx will look for your conf.py file, and build the .rst files into an index.html file:
$ make html
View the results
Whenever you make changes to your .rst files that you want to see, repeat this build process.
Note
To exit from the virtual environment execute:
$ deactivate
Install Sphinx manually
Skip this step if you created a virtualenv in the previous step. If you dont want to create a virtualenv, you should install Sphinx here, and follow their getting started guide.
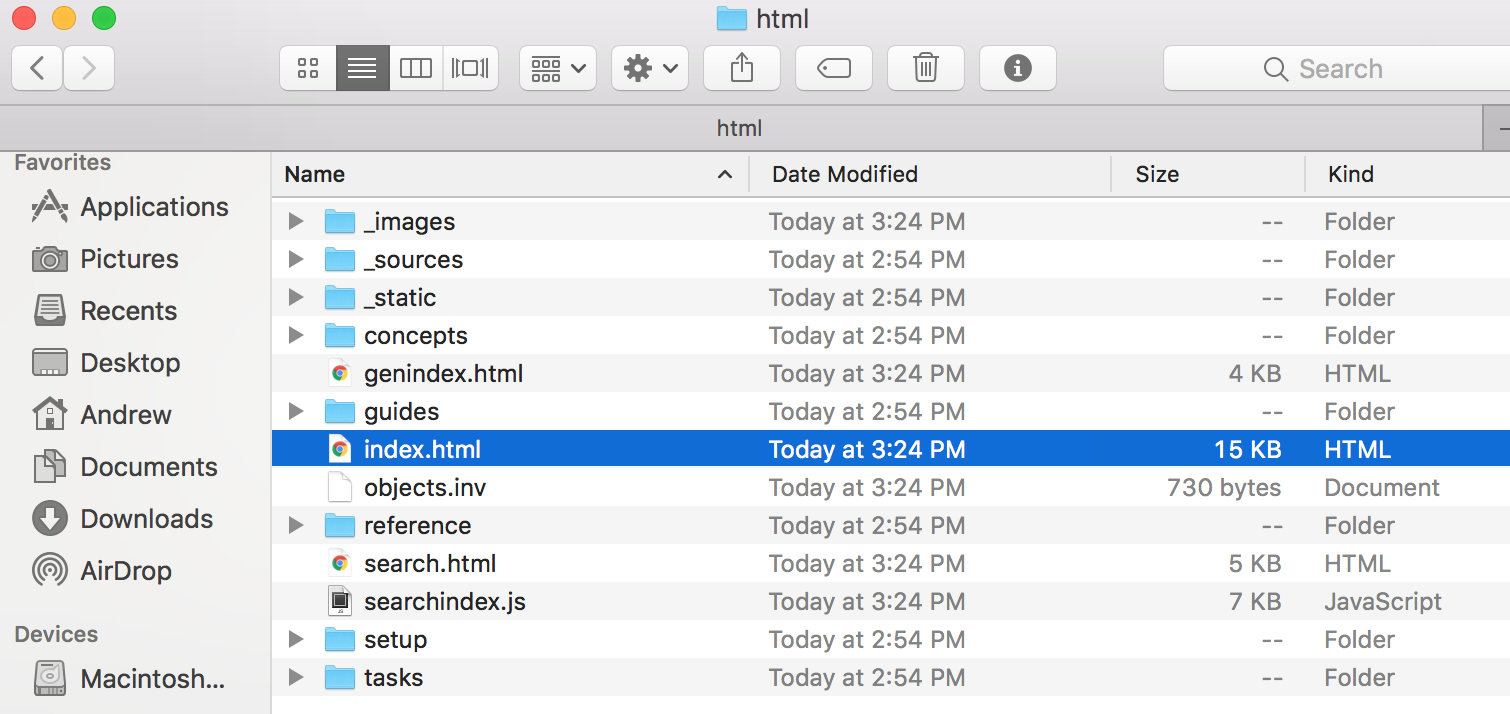
Building these files will generate an index.html file, which you can then view in your browser to verify and see your file changes.
To build your files, make sure you’re in your vpp-docs/docs directory, where your conf.py file is located, and run:
$ make html
Whenever you make changes to your .rst files that you want to see, repeat this build process.
Using Read the Docs
Read the Docs is a website that “simplifies software documentation by automating building, versioning, and hosting of your docs for you”. Essentially, it accesses your Github repo to generate the index.html file, and then displays it on its own Read the Docs webpage so others can view your documentation.
Create an account on Read the Docs if you haven’t already.
Go to your dashboard , and click on “Import a Project”.

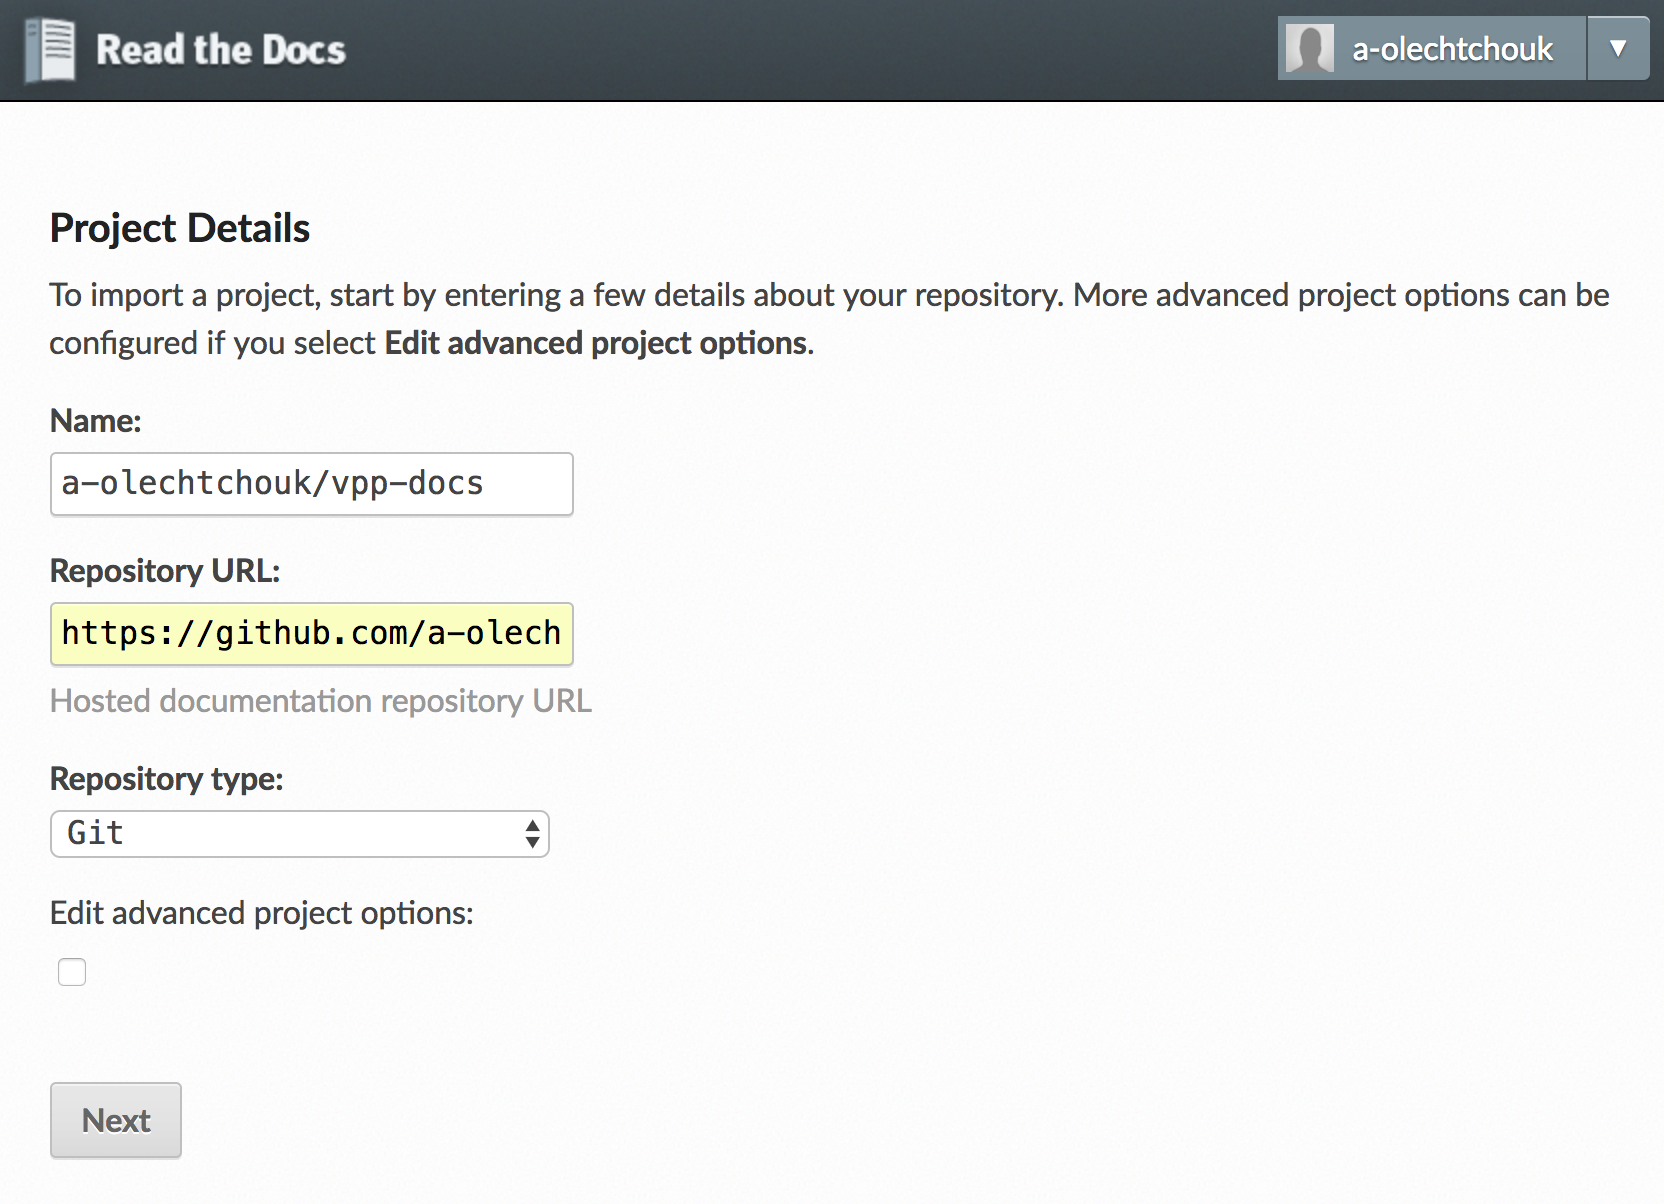
This will bring you to a page where you can choose to import a repo from your Github account (only if you’ve linked your Github account to your Read the Docs account), or to import a repo manually. In this example, we’ll do it manually. Click “Import Manually”.
This will bring you to a page that asks for your repo details. Set “Name” to your forked repo name, or whatever you want. Set “Repository URL” to the URL of your forked repo (https://github.com/YOURUSERNAME/vpp-docs). “Repository type” should already be selected to “Git”. Then click “Next”.
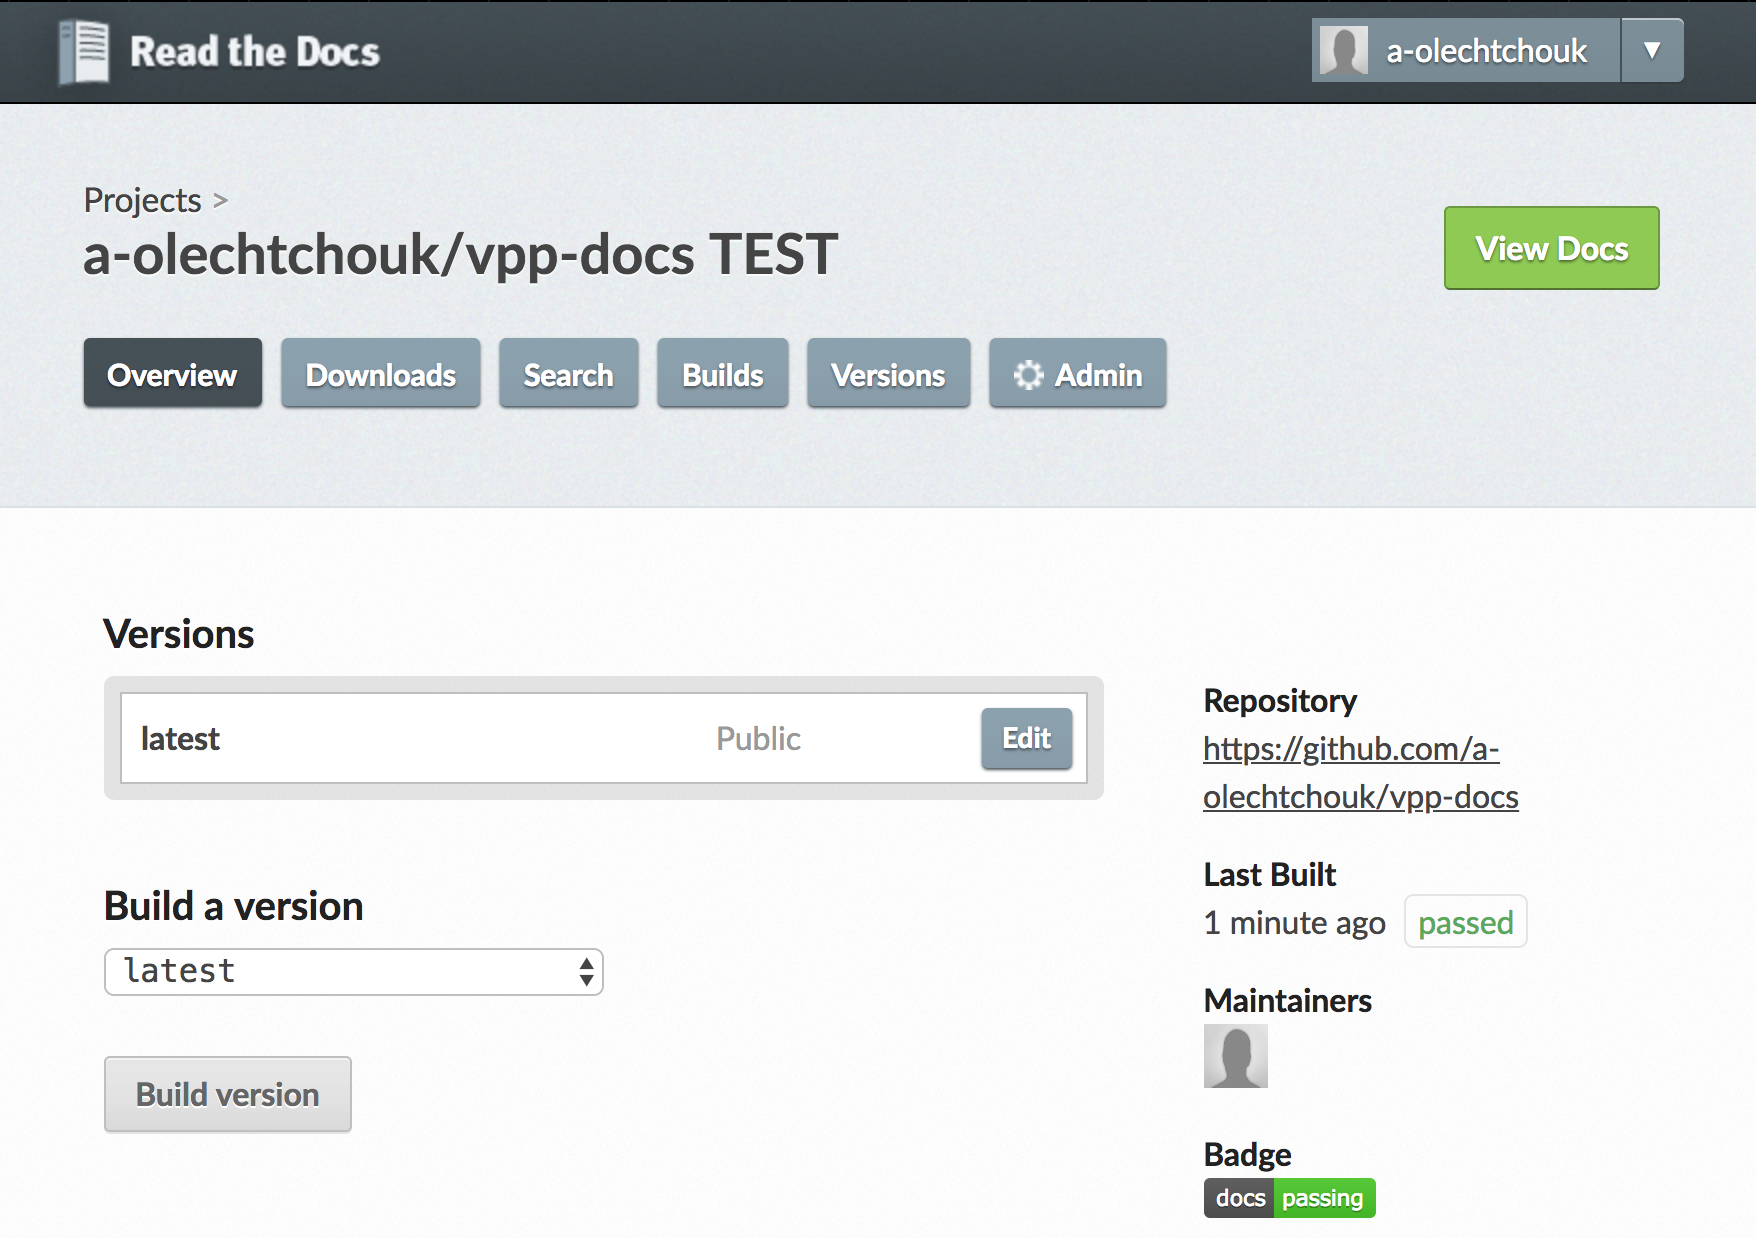
This will bring you to a project page of your repo on Read the Docs. You can confirm it’s the correct repo by checking on the right side of the page the Repository URL.
Then click on “Build Version”.
Which takes you to another page showing your recent builds.
Then click on “Build Version:”. This should “Trigger” a build. After about a minute or so you can refresh the page and see that your build “Passed”.

Now on your builds page from the previous image, you can click “View Docs” at the top-right, which will take you a readthedocs.io page of your generated build!